How to create a snare just like Tyler, the Creator
In this article, I am going to write about the snare sound of Tyler’s track „Earfquake“ (feat. Playboi Carti), which Tyler produced himself.
Introduction
Tyler, the Creator is a multi-platinum selling rapper and hip hop producer from Los Angeles. One of the keys to his success is his unique sound. The track “Eafquake” is the second song of Tylers fifth album Igor from 2019. Its sonic landscape is sounding very distorted and diffus, yet retaining a modern hip hop vibe. Listen to how the production of the drums really contribute to that:
The snare sample he used is reminiscent of a classic Roland TR-808 snare sample - an oldschool sound originally coming from an analogue drum machine - that is and has been all over pop and hip hop music for the past years. A classic 808 snare sample sounds like this:
Like the song in general, the snare sound is a bit different to that of a regular 808 driven hip hop production; And now I am going to explain how you can easily achieve that on your own!
How to recreate the snare sound
First off, compared to a more common 808 snare, the track´s snare sounds as if it’s been pitched up a bit. You can do that in any DAW that you may use. I am using Logic Pro, so I am now going to explain how to do that in Logic.
First, you need to create a software instrument track in logic and open up an instance of the stock drum machine designer. That should look like this:
Setup Logic Pro project for ‘How to create a snare just like Tyler, the Creator’
Second you need to get a 808 snare sample. Logic and most other DAWs come with free stock versions of this snare sound, but you can also download the sample I used, if you click on the download icon on the audio player above.
After you’ve got your sample, open up the drum machine designer and drag the sample into one of the pads on its surface. The drum machine designer should now look like this:
Add a snare sample to the drum machine designer using aptone
In the pitch section right in the bottom of the plugin you will find different options to change the samples´s pitch.
For recreating the sound with my sample, I found that tweaking the coarse and the fine knob in combination works best. Just play around with it until it sounds good to you! I also found that tweaking the coarse knob just a little bit works best for me.
When you’ve got the pitch of your sample right, you can add a further effect to alter the sound and make it a bit more distorted, like in the original track. You can use a bitcrusher to achieve that effect.
To do that in Logic, open up an instance of the stock bit crusher plugin on the software instrument channel that you’ve just created. Then, just play around with the knobs until the result is sounding good to your ears! Be careful with the volume though, distortion and bit crusher plugins tend to make the signal a lot louder. The settings that I found were working well with the sample I used look like this:
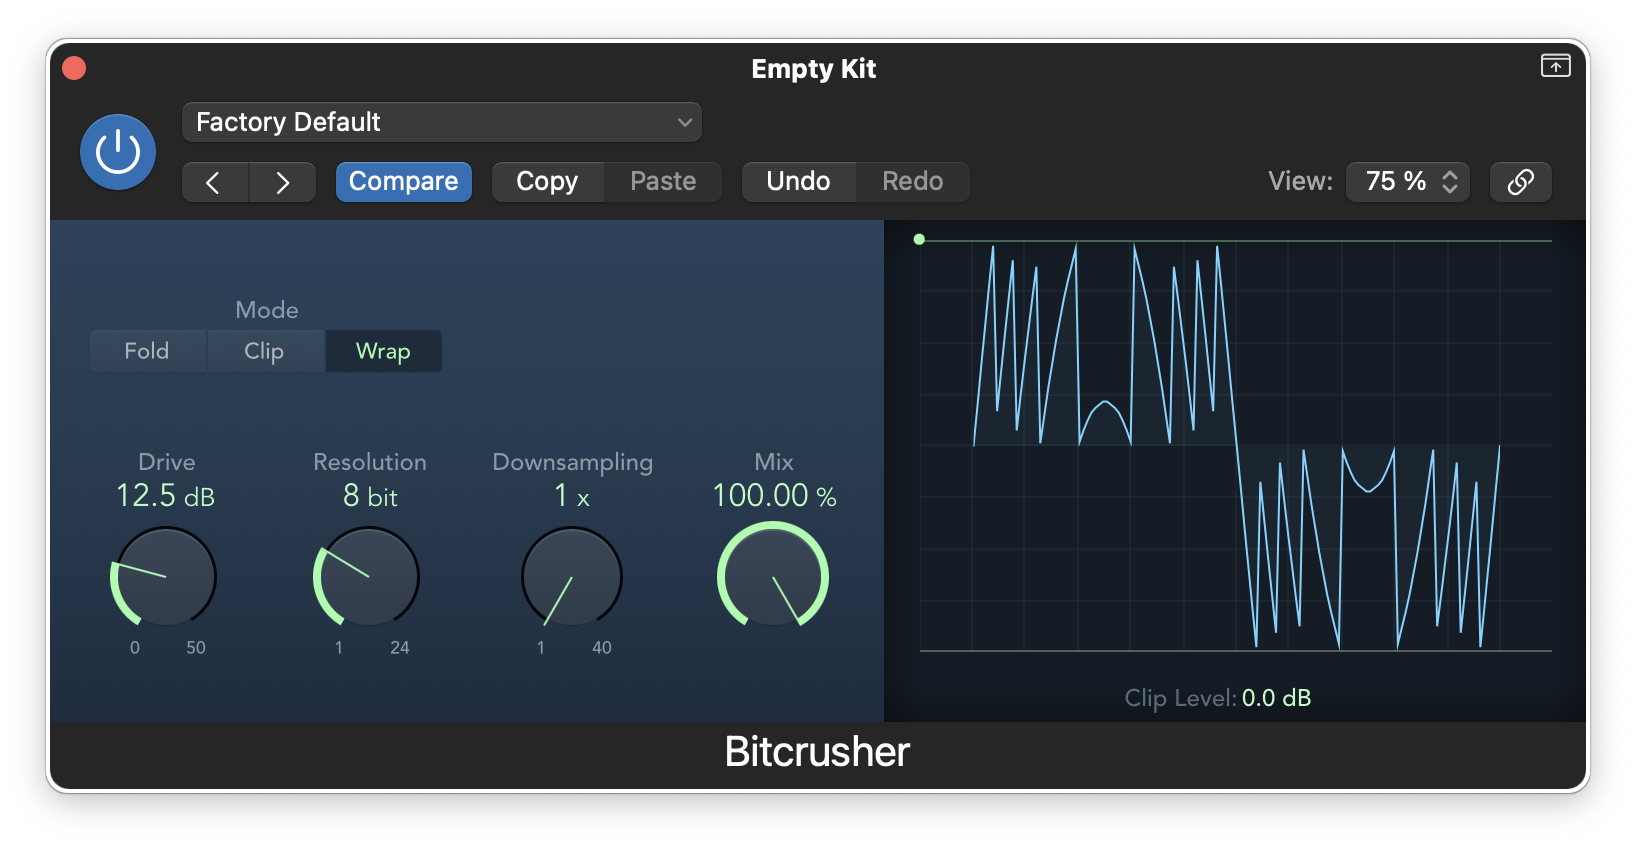
Logic Pro Bitcrusher plugin settings
Layering the snare
Later in the track Tyler uses a clap that he layers on top of the snare, to make the last section of the song sound more powerful. Listen to the video above how this trick adds excitement in the arrangement.
To do that, you can use every clap sample sounding good with the snare you just created. Choosing an 808 clap sample might just work great, for example!
My version of this trick sounds like that:
If you want to use the sample that I used for this, you can download the sample right here:
Just drag it into the drum machine designer and give it a shot!
About the author
