
How to make your live drums sound bigger!
Introduction
Mixing live drums can often be a difficult process. Especially under hardening conditions, for example if the recordings have been done in a difficult acoustic environment or if the drummer doesn’t have great dynamic control over his or her playing. To still establish an element of perfection, audio professionals often rely on adding drum samples to their mix, either as a replacement or an addition to the recorded drums. You can hear these types of mixes anywhere from the radio nowadays to way back in the late 70’s, when the mixing engineer Roger Nichols invented that technique while he was mixing a Steely Dan record. Overall, this trick is often used to make the drums cut through the mix and to make them sound bigger.
Take a listen to the track below by Steely Dan which is a well known song featuring drum samples in the early days:
How does it work?
There are many ways to do what is often called sample replacement. It is most often used to support the kick, the snare or both in the mix. You can manually program a sample to play each time the drummer hits the snare for example, but there are also plugins to automate that process.
In Logic Pro there is a stock function for that. So now, I am going to show you how to do that in Logic!
Step by step
First, select the drum track that you want to create the sample track from. Navigate to „track“ and click on „replace or double drum track“.
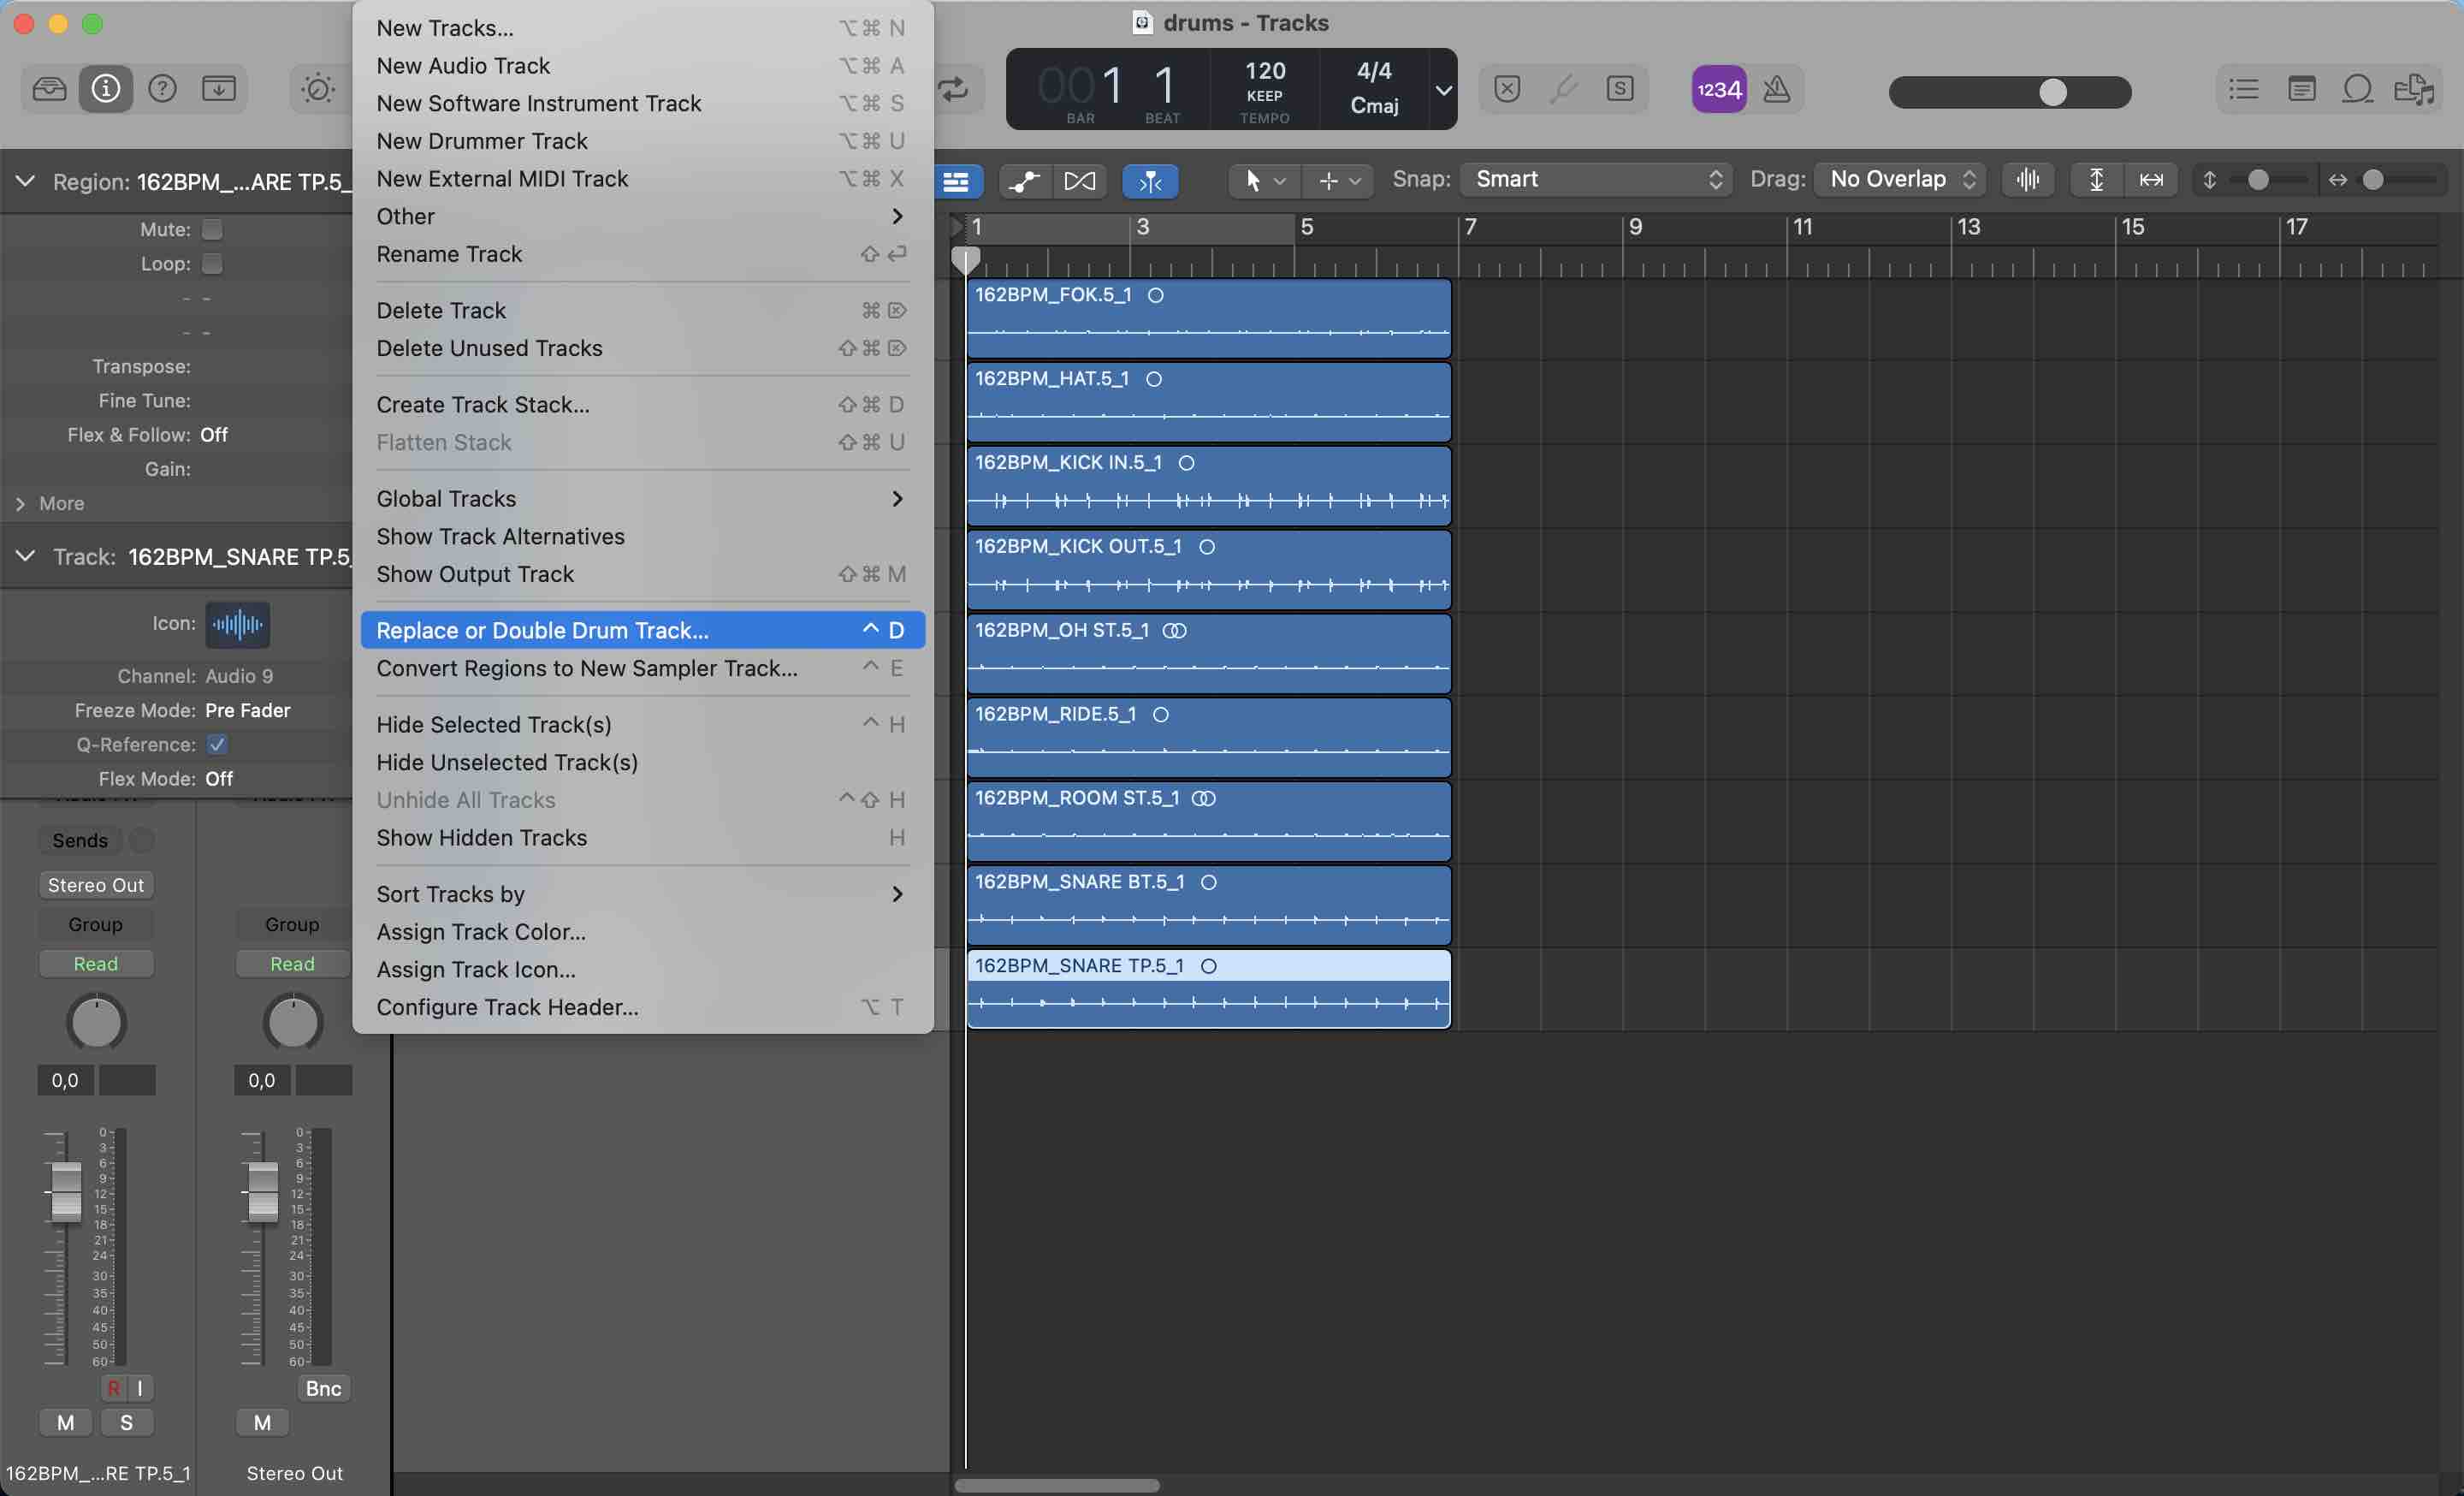
Open the Logic Pro drum replacement window
You can also download the drum tracks I used, if you click on the link below:
Listen to the snare recording which I will use for the replacement.
Now a window with the settings and a midi sample track should open up.
First go ahead and select what kind of drum track you just choose to create the sample track from. You can select between kick, snare, tom and other. We will choose the option snare because we want to replace the snare in the selected drum track. Also you can decide between using the sample track as an addition or a replacement to the recorded drum track. If you choose to use it as a replacement, it will mute the original track. But for our example we use the doubling drum track setting.
The threshold essentially works as a trigger that you can set up to determine the extent of the signal that it turns into midi on the sample track.
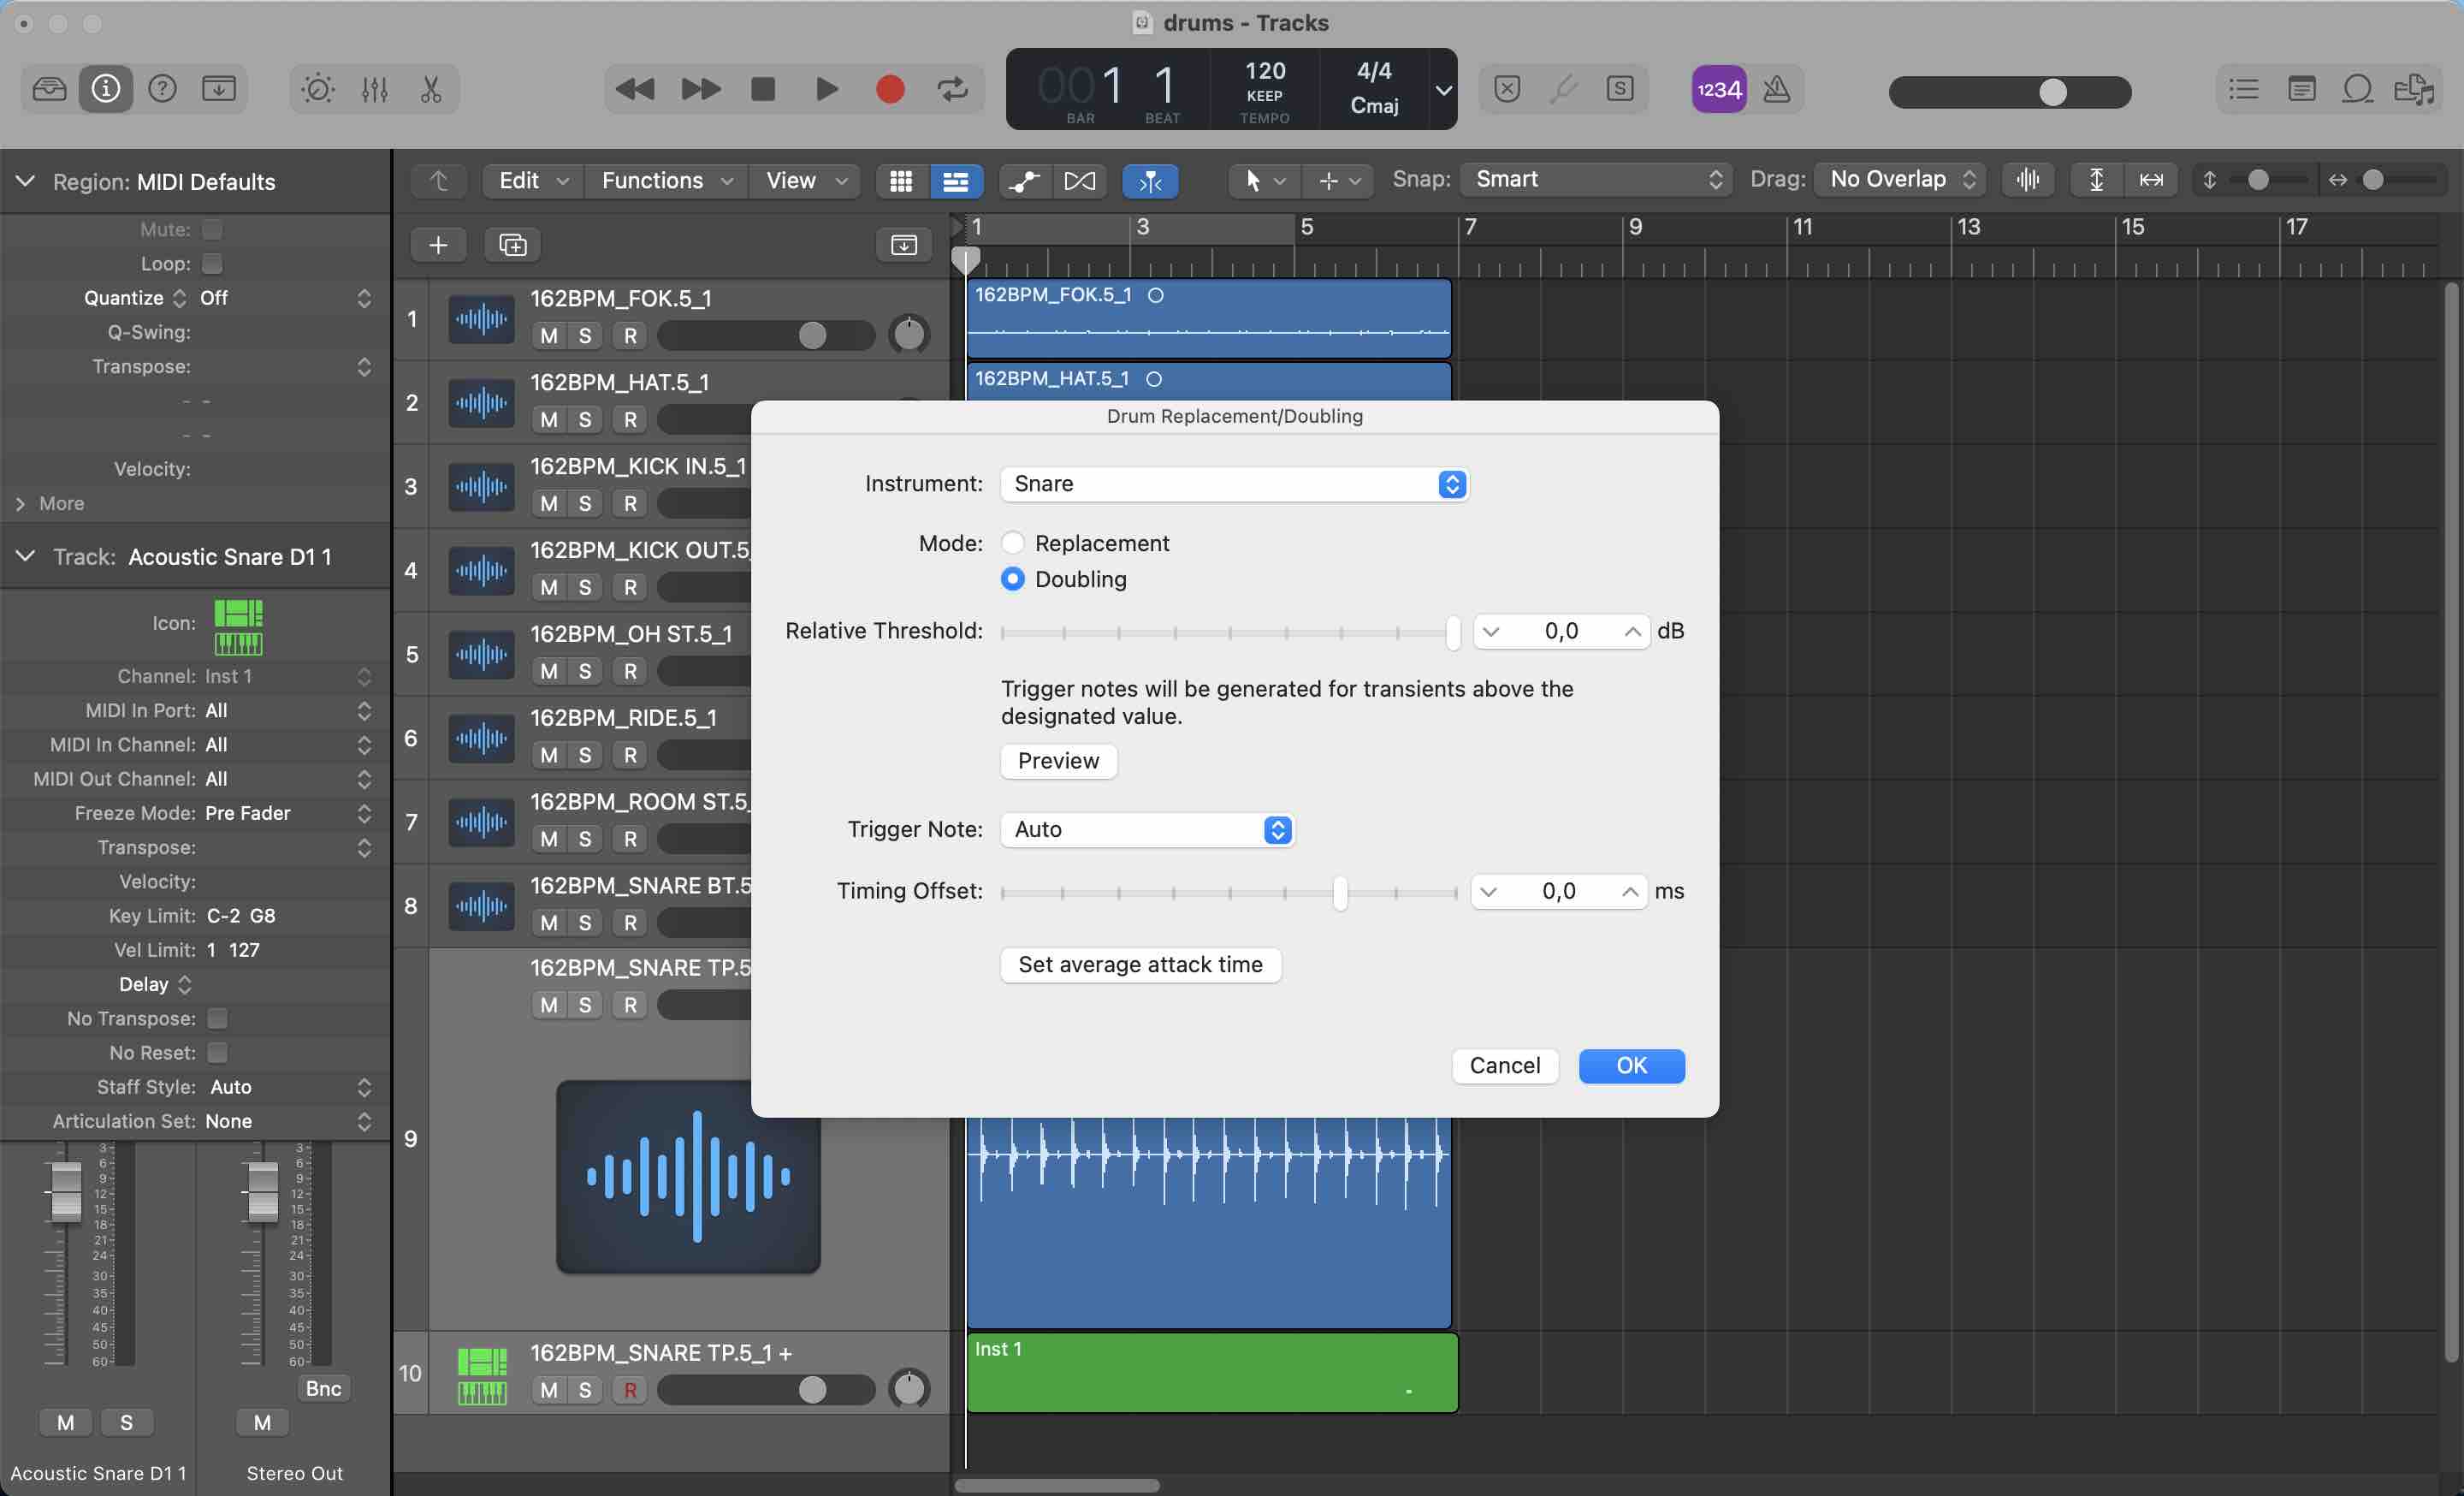
Logic Pro drum replacement settings window
Since there will probably be bleed on the snare mics, you can use this feature to tell logic how much of the signal you want to use and how much of the signal is just noise from the rest of the kit.
Play around and listen to how the midi track reacts to the changing threshold settings. I will use a threshold of -6dB which fits well to the underlying drum track. In addition you can also adjust the attack time to make the sample match your recorded tracks.
After you’ve set everything up, hit „ok“ to apply the settings.
Now you can pick the sample that you want to use, depending on what you are missing in the recording. Logic offers a couple of stock sounds to use for this.
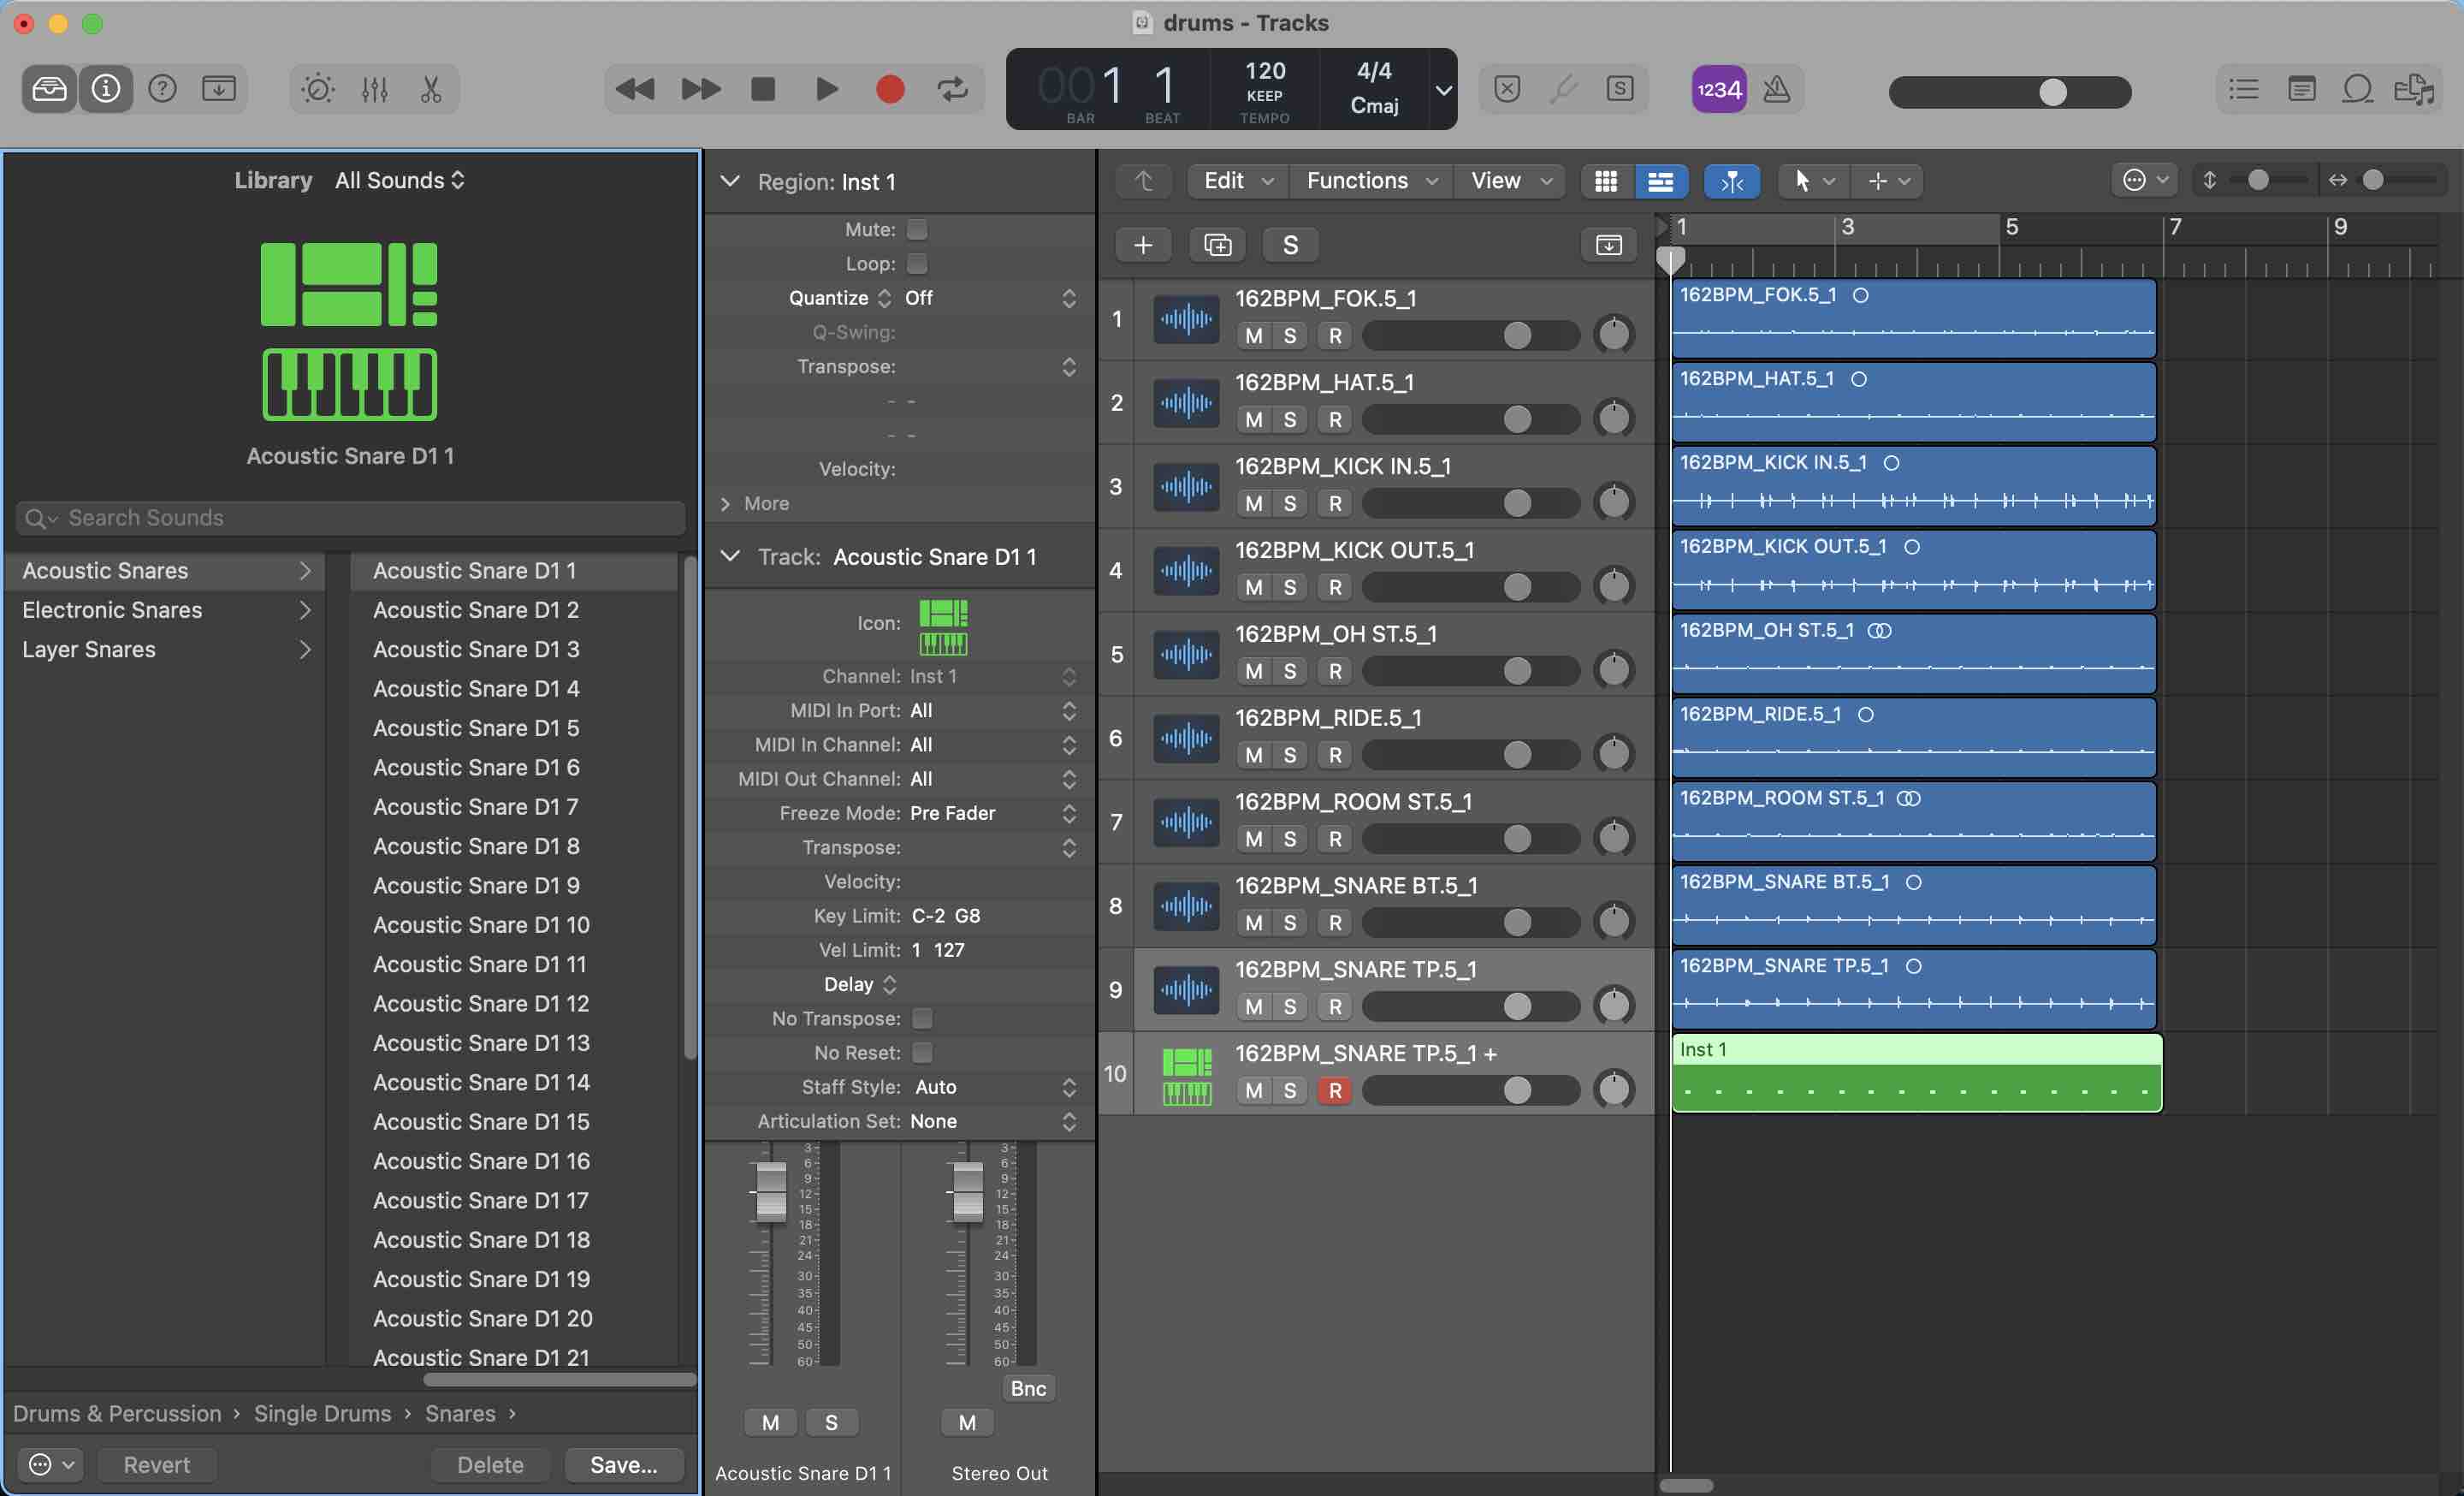
Logic Pro snare drum replacement selection
Since you have essentially just created a synced midi track, you can import any external samples of your choice. For example from a sample pack that you’ve downloaded.
Try it on your own and give it a shot!
About the author
